Since school started and my focus has been either there or at home with Charlotte, I haven't done much ecomodding. Actually, I've done negative ecomodding; I removed my coroplast stuff to get an alignment check and I haven't reinstalled it yet. The main reason I'm waiting is that I'm trying to build my MPGuino - I was really disappointed with my original idea to monitor tank-to-tank mileage with mods, because it wasn't reliable. In true form with scientific method, I'm stopping my experimentation and restarting everything after I get some electronic, instantaneous numbers.
Stay tuned for some ecomodding after Christmas!
plans:
-newer style front air dam and belly pan - starting out farther, about 4cm higher from the ground (old one scraped a lot!) and going up to the hood level. Also a sweet chin spoiler!
-complete detachment of alternator electronics via installation of Deep Cycle battery to have plug-in electrical power supplied from my home (we buy Wind Power Renewable Energy Credits from our power company for 100% of our needs, so no fossil fuel emissions!!)
-Removal of power steering system. This car definitely doesn't need P/S. I can turn the wheel at a dead stop with the car off, and looping the lines will make this even easier.
-installation of 45W solar panels in roof to augment alternator-less condition for more range
-something to clean up the wake of the car off the rear.
My target is 60 mpg on my daily commute.
Sunday, November 23, 2008
Monday, October 13, 2008
Old Mustang - good aero? Photo for thought.

Ugly, but probably had decent Cd and therefore would have high top speed. Might not be stable at speed without a spoiler though.
Something new:

Thursday, September 25, 2008
Still shooting for the 500 mile club...
My last several tanks have shown a 40 mpg average. I was hoping to get to 500 miles on this tank, but I didn't want to push it today, wussed out, and filled up with 1/2 gallon to spare. I wouldn't have made it anyway :( Of course, my odometer read 576 miles, but I'm pretty sure I just didn't reset the odometer at my last fill-up. Oh well, I know I can hit 500 on my next tank.... time to maxinflate the tires. I'm postponing official...official testing a bit longer.. turns out the baby and school are keeping me BUSY and I'm also watching the MPGuino project on Ecomodder.com - since my mpgs are all over the place by as much as 4%, I want to have a real-time, electronic measurement of my mileage. Right now that's available to only '96 and newer cars with a ScanGauge, but the MPGuino will make it possible to do it in the 'scort.
Wednesday, August 20, 2008
New Tires...Yay!!

I took a trip with my daughter, Charlotte, to AutoTire today. I did some calling and they had the best deal, and the best warranty/free service that goes with the tires. They got the car in quick and put on 4 new tires for $200 including tax. I had one tire that leaked 5psi per week, two that were worn to ~ 2/32" - around the state minimum. The fourth tire on the car was horrible, with flat spots and bulges. All four wheels were out of balance, which resulted in lots of my down-the-road energy being converted to up and down vibration. Aside from being noisy as heck on the highway and making the back seat the "rumble seat", it takes a lot of energy to shake the car as much as it did. Time to top off and watch the next couple tankfuls!
I noticed a very quiet ride on the way home and longer coasts, even with the tires at the same pressure as before. School starts tomorrow, so I can run the car down my official "coastdown testing hill" a few times over the next two tanks to observe any change.
One other bonus for after I establish how much gas I was wasting because of bad tires: my old tires' max pressure was 35 psi. The new ones? 51. :)
Monday, August 18, 2008
More Mainstreaming of Ecodriving
Although they're later than others, so I don't think they should be able to trademark the term, "ecodriver", I'm happy to see US automakers and everyone's favorite governor backing ecodriving. Check it out!
http://www.ecodrivingusa.com/
Official testing of the 'scort is due to begin in a couple of weeks. It's due for some new tires, and my commute will become regular once our little one begins daycare. Stay tuned!!!
http://www.ecodrivingusa.com/
Official testing of the 'scort is due to begin in a couple of weeks. It's due for some new tires, and my commute will become regular once our little one begins daycare. Stay tuned!!!
Tuesday, July 15, 2008
Plans for Partial Alternator Elimination
I've been thinking about this for a couple of days, and after reading about mpg gains in the 10% range on ecomodder.com via removal of the alternator belt, reading about GM's EV-1 plug-in electric car (which worked fine, but they destroyed because... well who knows) and the new, exciting aptera, I've decided to hybridize the Gascort.
Removing the alternator belt is good for testing, but not especially valuable for long-term use. In addition, the computer, fuel pump, and injectors rely on a 14-15V source from the alternator; the battery only runs about 12-12.5V at best, so running them on the batteries when they were designed with the alternator in mind can actually cause worse performance of injectors and sensors, hurting fuel economy. Several other ecomodders have done this with no ill effects and increased FE, but I'd like to modify their ideas a bit for my own use. I'm planning to lessen the load on the alternator by only having it attached to crucial electronics and disconnecting it from the rest of the car. This should work to increase horsepower and reduce drag, because alternators vary the amount of resistance inside them to correspond with electrical demand. When my buddy Brandon had a huge (2000W at least) stereo in his car, you could feel the car dragging hard when he turned on his amplifier.
Whoa..Wait a second there, professor. You can't just disconnect everything else and have it magically charge up by itself, for free! That energy has to come from somewhere, doesn't it?
Yes. I'm planning on plugging my car in at night to charge for the non-integral systems, namely the lights, radio, wipers, blower fan, and the starter. Eventually I'd like to add a solar panel to charge while the car's parked at work.
How does this fit in with the whole saving fuel bit? Here are my three arguments as to why I'm doing it:
First, consider that you're using a relatively cheaply made alternator to take mechanical energy and turn it into electrical energy. The electric utilities have much larger and thus more efficient units with less mechanical energy wasted as friction.
Second, consider your source of mechanical energy. Your car, with its fairly advanced emission controls and fuel-injection technology is good at extracting energy from gasoline, but isn't as optimal as it could be.
Third, consider the cost of fuels from which we're making electricity. Coal (our traditional source) is WAY cheaper than oil and will continue to be for the foreseeable future; we have at least 300 years of it left. Nuclear, hydroelectric, wind, and solar are cheaper as well, and will only become better (cheaper than the equivalent amount of energy from oil) in the future.
Google.org (Google's philanthropic group) is developing plug-in hybrid technology now with their fleet. Check it out - it's pretty cool and it drives the effective efficiency of their hybrids up considerably. They consider their gas MPG and log the cost of electricity used to charge them overnight for a cumulative MPG total.
http://www.google.org/recharge/

Here's a schematic of my plan. (click to enlarge) It allows for a cheap lawn mower battery to be used as a capacitor in the alternator - ecu circuit, and a source of power as the ecu needs to be on before the engine is turned over.
The regular car battery remains in its current state, wired to everything else on the car. I'll install a heavy gauge wire and a heavy duty "charge switch" between the two systems so I have the option of using the alternator as it's typically used. I think I'll try to use it when decelerating at offramps and down hills as well. The reason I want it to be capable of 50-60A is so if the big battery is drained down past the point where it'll turn the starter, I can use the lawn mower battery to do the job (infrequently, for sure, but a nice emergency jump-starter).
I will need to get a volt-meter to monitor my big battery's charge so I can charge it before it goes dead. For now, I'll probably wire my Digital MultiMeter (DMM) in to watch it.
Thursday, July 10, 2008
Mirror, Mirror On The Car
After the deletion of the passenger mirror yesterday, I was so excited about removing over one square foot of frontal area of the car and probably a large increase in the car's coefficient of drag that I decided I would go ahead and do the other side. Before removing both mirrors, I had to find some replacements for safety and to keep the car legal...
MO 307.170.4. Mirrors: All motor vehicles which are so constructed or loaded that the operator cannot see the road behind such vehicle by looking back or around the side of such vehicle shall be equipped with a mirror so adjusted as to reveal the road behind and be visible from the operator's seat.


MO 307.170.4. Mirrors: All motor vehicles which are so constructed or loaded that the operator cannot see the road behind such vehicle by looking back or around the side of such vehicle shall be equipped with a mirror so adjusted as to reveal the road behind and be visible from the operator's seat.
Missouri's code doesn't have specific rules (basically, a mirror has to provide a clear view of the area behind the car), but in most states, there must be a minimum of one outside mirror. Many small vehicles came several years without a passenger side mirror (except as an option) such as the Ford Festiva, the Geo Metro, and the Honda Insight.
I followed others before me from ecomodder and fashioned some interior mirrors using homemade brackets and convex "blind spot" mirrors.


I found a great solution to having an outside mirror as well. Even though it's not required by law, I'm sure lots of police officers will think they know otherwise. I don't want to get hassled unnecessarily, so I used a really neat wedge-shaped convex mirror designed to be stuck under large SUV mirrors. It came in a two-pack for $8 at O'Reilly Auto Parts. Here are some photos - with the "baby mirror" and no passenger mirror, I removed over two square feet of frontal area.


I also finished the grill block wraparound and I decided while I was at it I'd continue it to make a partial wheel skirt. It looks pretty good - hard to notice except for the off-green color in my opinion.


BEFORE:

AFTER:

Wednesday, July 9, 2008
Changes, Changes...
Well, I was driving the car home yesterday and a huge thunderstorm hit us - probably one of the top 10 downpours I've ever witnessed. The previous owners stressed that the sunroof of the car leaked sometimes when I was buying the car, and I have noticed some dripping from time to time. Last night, I would have had less rain on me if I had the thing open! I had to take my wallet out of my pants pocket for fear of it being ruined, and I was soaking wet when I got home (the rain had just stopped) and got out of the car. First things first: Today, I had to fix the Monsoon brand sunroof. I popped it out and used some 3M Windo-Weld (from the roll) that I had left over from a buddy replacing some window glass. The stuff is really easy to use, and stays pliable and sticky for a long time. I just use my hands - I don't know that the warning on the label is about. Hopefully the sunroof will leak no more. 


I had some spare time this morning, and I was in the mood to change the car. Low-hanging fruit, as many of the guys on ecomodder say, were the roof racks, passenger mirror, and passenger wiper. I started with the wiper, then decided to adjust the drivers' side wiper to rest in the lowest possible position:

Above: Before (pass wiper already deleted) Below: After

Next to go was the passenger side mirror. I need to go get a small convex mirror to mount inside.. will do that this afternoon. I replaced the mirror with a piece of coroplast.


I didn't like how the top was sticking out away from the car a bit (see above) - for drag and for rain purposes, so I fixed it with the ever-handy Windo-Weld!

Next came the roof rack. I'd been delaying this because I didn't want to re-do it later for official testing, then take it off again. I was also concerned with filling the big gaps in the roof trim for the mounts:

I decided to use some pieces of scrap Coroplast (that stuff is handy too!!) and duct tape over the top. If I like this method, I'll use some high quality duct tape when I make my permanent version.

Monday, July 7, 2008
Partial Belly Pan Complete!
I worked most of the day on the grill block, air inlet, and belly pan. It took some time to get things going, but once I did, everything went fine. I'm thankful for the creator of self-tapping screws, and I'm glad I had the drill-tip type and the pointy-type. I incorporated some 45 degree air dams in front of the tires similar to those I've seen on other ecomodder rides and many new production cars. I test-drove the car in the alley briefly today, and I found that I should only scrape when I take bumpy turns quickly. I know of one such turn I'll scrape daily; the entrance to the high school where I teach. I'll have to be cautious elsewhere I'm sure; I know Linda will appreciate the extra slowness going into and out of bumpy driveways where I usually get yelled at.
Here are some pictures of the progress. I won't have the grill block totally done until later this week - I have to finish the sides right in front of the wheels and reduce the wheel well size a bit, but that won't take me more than 30 minutes to fabricate, attach, and paint.
New air inlet - note the coroplast ductwork - it extends through the original bumper, so air has no way around the radiator.

"frame" for belly pan, made from drop ceiling material scavenged from dumpster.

Unpainted belly pan - I painted the wheel air deflectors (front and back) green after I took photos. I don't think I'll waste paint on the underside seen here.

Tire Air Dams/Deflectors - they are held at an angle by a piece of the metal I was using - crimped around the outside edge, screwed to hold tight, then taped.

New grill block - work in progress
I removed the old grill block completely, and made a new one with a new purpose in mind. Rather than direct air below the car where I'm unlikely to make it really aerodynamic, push air up over the car and to the sides. I did some reading on the ecomodder.com forums and decided to go for it, using a higher point of attachment on my bumper (the furthest forward part) and having the grill block hang straight down and slightly forward at the bottom, like I suggested in my "new idea" post, but not as extreme. Best would be to have a low, pointy nose. There are three reasons I'm not doing this. First, it would scrape on the ground EVERYWHERE. The one I designed will do that enough. Second, it would be forcing a lot of air upward when traveling on the highway. Newton's second law, F=ma, shows that a large force would be required to make a large mass of air accelerate upward, which would likely wreak havoc on my poorly constructed grill block frame. Third, (and Newton's Third - it's a good thing I did it in this order!!) the large force imparted upward on the air would be pushing downward on the block and my car.
A long lever arm in front of a lightweight car with some force on it could make the 'scort do funky things at highway speed by taking weight off the rear tires. Too much to worry about.
I used more free parts here: coroplast campaign signs for the flat stuff, and the frame that goes around the whole bottom and also attaches the center to the bottom of the radiator support is made of some drop-ceiling metal trim that I found in the dumpster by my house. I'll have to be careful; Linda will want to take out the trash to prevent me from finding more stuff if I'm not careful!
Here's progress so far; you can click on images to enlarge them if you wish.


I still have to do some work on the underside, to make my front belly pan, and on the air intake portion to keep air from just shooting down around the radiator.

BELOW: Shot from in front of air intake, looking slightly downward.

Wednesday, July 2, 2008
New idea...
In response to cooling issues and aerodynamic theory (I didn't study enough before hastily starting the grill block), I'm changing my plan a bit..

Preliminary aero mods data is in...
This isn't scientific (not enough miles), but I made a repeat trip to my friend's house in St. Peters, approximately 30 miles from home, mostly highway. On the last trip, I was able to get 45.5 mpg. I figured this might be slightly elevated by pump error, as this is incredible economy. This trip differed in two ways: it was hotter outside today, and this time I had my wheel skirts and grill block installed. 47.2 mpg is my new high; although the results aren't conclusive, they do suggest a gain of ~2 mpg at 55-60 mph. If this is correct, they will be most useful when traveling on faster highways to and from Kansas City (70 mph).
A side note regarding recent sensationalism in the news and AAA's press release denouncing hypermiling...
Some people might point out here with my 70 mph comment that they've heard that hypermiling involves driving slower on highways. I don't EOC or coast, etc. on highways except on offramps. My highway hypermiling is to drive at the speed limit (which does end up being slower than traffic), in the right lane with the windows closed. If I can find a large vehicle to follow, I do so from at least 5 car lengths.
Hypermiling has gotten a lot of bad press recently, and I make sure that my driving doesn't overly annoy other drivers or pose a safety concern. My EOC driving is on city streets when approaching stoplights/stop signs or when on a long downhill. I don't camp in the left lane and "police" other cars to drive the speed limit, and I don't EOC to speeds more than 5 mph below the speed limit if there is a car behind me on a two lane road. Doing so is counterproductive to the fuel economy movement, and I'm hoping to get more people on board.
Tuesday, July 1, 2008
Air to cool the engine? Who needs it?

Well, I was a bit overzealous in my grill block. I originally had a small opening just below the license plate. This afternoon I worked to trim the grill block top to fit flush with the bumper, and I re-taped and re-installed before Linda and I went to the doctor (weekly ob checkup; our little one still isn't coming out!)
Linda was warm in the car so I turned on the A/C once we got on the highway. I noticed engine temps at the hot end of my gauge shortly after... I cracked the windows and sunroof and shut down the A/C for the rest of the drive and on the way home, but the engine temps stayed too high. I know the A/C will push the cooling system's capacity with a grill block, but I need to at least get to where I can drive the car, A/C off, without overheating. I trimmed it a bit tonight and made the opening about 2.5 - 3 times the original size. Tomorrow morning I have a 30 minute drive; we'll see what happens.


Added a little EcoModder Bling

My wonderful wife found my lost ecomodder.com window cling decals this morning, and I installed them right away. I wasn't getting a whole lot of contrast between the white letters and the gray interior, so I painted the paper backing from the decals black and taped it on as a background. I put one in the passenger rear window and one on the drivers side of the hatch glass.

Monday, June 30, 2008
Two aero mods in one day...
I finished the other wheel skirt today, and in response to a 6-2 vote on Ecomodder, I purchased some green Krylon Fusion paint (works on plastic). I used the paint already on my rain barrel, so I knew it was worth the $5 price tag. I got the skirts painted, which seemed to greatly please my neighbors, and although the skirts are a darker "hunter" green, they look great.


I still had time before Linda came home, so I started work on the grill block/air dam. I taped an individual sheet of coroplast in place, measured how long I wanted it, and got to cutting.


I taped all the edges really well with my heavy duty duct tape prior to painting, and I got to use the license plate as a giant washer since I put two screws through the bottom of it near my new (smaller) air intake. I'm going to trim it tomorrow to match the bumper lines, remove it, re-tape the top, and re-paint it. I'm really pleased with the outcome.
Before:

After:

Whole picture:

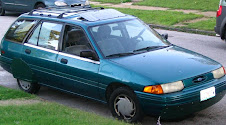
$2.50 Wheel Skirts!
I set out today to begin streamlining the car. In an effort to satisfy my requirements of the car and its modifications paying themselves off, and because I'm known for my frugal nature, I'm using super low-cost materials. Here's the car's profile I started with:  No, I'm not campaigning for Hayes. That's a corrugated plastic sign (coroplast) that I picked up for free after the election. (I got 100 of them) I also needed some support structure that was cheap and lightweight. Luckily, I found something to fit this need in my basement, left by the previous owner; sheetrock (drywall) corner - reinforcing metal braces. (I don't know what they're really called) Here are my assembled tools; drill, 1/4" nut driver bit, 3/32" drill bit, measuring tape, duct tape (bought the highest quality type), self-tapping sheet metal screws, large washers, tin snips, pliers, and a comfy seat. The sheetrock corner-thing is the piece of metal there. I folded it flat (usually it is at 90 degrees).
I decided to run one brace across the wheel well and one at the bottom, attached to the sign. Here's the first brace. I attached it to the inside of the door opening with a sheet metal screw and to the back bumper with a spare interior trim screw.

I then taped two signs together, enough to cover the opening, , set it inside the folded sheetrock brace, taped the bottom up (coroplast is hollow and open at the ends)and ran 4 sheet metal screws through it to lock it in place. It felt pretty rigid after this. Here's what I mean by, "inside the folded brace":


 I think I will add a little "class" to this mod and paint the coroplast, so they will end up costing about $5 in materials each. I'm going to either do white with my "ecomodder.com" decals on them to help them stand out, or green to match the car. I'll be running a poll on the ecomodder forums to decide for me.
 No, I'm not campaigning for Hayes. That's a corrugated plastic sign (coroplast) that I picked up for free after the election. (I got 100 of them) I also needed some support structure that was cheap and lightweight. Luckily, I found something to fit this need in my basement, left by the previous owner; sheetrock (drywall) corner - reinforcing metal braces. (I don't know what they're really called) Here are my assembled tools; drill, 1/4" nut driver bit, 3/32" drill bit, measuring tape, duct tape (bought the highest quality type), self-tapping sheet metal screws, large washers, tin snips, pliers, and a comfy seat. The sheetrock corner-thing is the piece of metal there. I folded it flat (usually it is at 90 degrees).
I decided to run one brace across the wheel well and one at the bottom, attached to the sign. Here's the first brace. I attached it to the inside of the door opening with a sheet metal screw and to the back bumper with a spare interior trim screw.


I then taped two signs together, enough to cover the opening, , set it inside the folded sheetrock brace, taped the bottom up (coroplast is hollow and open at the ends)and ran 4 sheet metal screws through it to lock it in place. It felt pretty rigid after this. Here's what I mean by, "inside the folded brace":


I also cut the pointy heads off the sheet metal screws that would be pointing in toward the tire with my dremel.
Next, I bent the bottom brace out so that the coroplast would clear the wheel, and screwed the front side of the brace into the door opening, and the back into the rear bumper. I used my knife to cut the shape of the skirt, which took some trial and error, but luckily I cut off small pieces each time and all was not lost. After getting a good fit (especially around the rear door), I removed the skirt and taped all the edges to seal them and for support when screws and washers hold it in place. After re-installing the bottom brace screws, I used 10 sheet metal screws and washers around the edge to affix it to the car. You wouldn't want to do this to a nice car, but for my purposes, it should work great. I taped the leading edge into the door opening to ensure smooth airflow outside the wheel well, and the door shuts well, clearing the skirt.


 I think I will add a little "class" to this mod and paint the coroplast, so they will end up costing about $5 in materials each. I'm going to either do white with my "ecomodder.com" decals on them to help them stand out, or green to match the car. I'll be running a poll on the ecomodder forums to decide for me.
Subscribe to:
Posts (Atom)