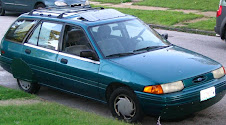
Lifetime Fuel Economy: 39.49 mpg

Monday, January 21, 2013

Sunday, February 21, 2010

Finished Photos + Results


This is a continuation of the air dam + crash bumper post from a couple of weeks ago.
After completing it, I took the fam on a 1,000 mile road trip to see my grandma near Wichita, KS.
We were reminded that folks in other cities hadn't become used to the car as we got lots of gawking and laughing at stops and on the freeway.

Things unexpected: Car started overheating in the first half hour of freeway driving. I was hoping these issues would wait for summertime, or at least when I didn't have the car's heater on full blast and warming up fresh and very cold outside air (it was the whole trip)
I pulled over and moved the license plate (it was blocking 3/4 of the radiator inlet tubes). We drove a bit more, and this seemed to help, but not much.
Stopped at a home depot and I used some expanding foam to seal off gaps around the radiator (I had it pretty well sealed inside with coroplast before). Was impressed later to see that this stuff held - within 5 minutes, we were back on the highway at 70 mph.
Car still ran hot the rest of the evening (250 miles).
The next morning, it occurred to me that there was a tiny gap between the hood and the top of the air dam which would experience really low pressures and an escape point for intake air without going through the radiator. Fixed with a strip of duct tape. Drove another 250 miles, and car stayed pretty hot, but not overheated.
In KS, I added some oil and found that my amber oil (when we started out) had turned very black - a bummer to have cooked the oil with the high temps. One last effort - placed the license plate just above the air inlet tubes and used pliers to bend the bottom 1cm of it sticking out to the front, parallel to the ground. This seemed to work better, finally. I had to add some water to the car about 3/4 of the way home, but no worries with overheating, at least in cold outside temps.

I think I'm going to ditch the four individual dryer vent tubes and make one rectangular coroplast duct. (I had one measuring about 10cm x 30cm on my old grille block and it worked great, even with the A/C on. I'm also going to add a lip at the top to create a stagnation point there. Also need to find a way to create a door that can be opened from within the car. On my commute, in cold weather, I would probably keep the radiator inlet fully closed.
Will get more photos when I take them and after I really finish these plans.

Wednesday, February 10, 2010

New Air Dam + Crash Bumper

Started thinking about this midway through construction of my first air dam, and thought about it as I removed it.... and continued occasionally modifying my plans over about a year or so now. Finally got a day to dump into it, and got it started. Did take some changes to my original plan; bummer but still should work great.
Goals for this mod:
•Improve by +3 mpg highway (less than 10%) vs. car in its current state (all other aero and no front dam / belly pan) by lowering stagnation point and pushing majority of encountered air smoothly over top/sides of car to take full advantage of kammback, etc.
•Improve safety in a frontal collision by adding crush space and materials which provide significant support and resistance to crushing, but will fold up easily with substantial impact.
•Improve warm-up times in the winter by completely sealing off/controlling the radiator inlets.
•Improve ground clearance vs. original air dam

(notice my opinions about the shape of the air dam / nose of the car have changed.... more reading ;)
Pictures of progress thus far:
Framework and crumple zone complete:

Original plan was to have some of my spare lexan polycarbonate follow the curve of the following photo. Turns out this angle is way too far past the critical angle for air/polycarbonate. Translation: The majority of light from the headlight was reflected down to the ground rather than passing through.
You can also see my air inlets in this photo:
Had to solve the problem of the lexan angle; sacrificed some aero for it but still a big improvement over stock, I think. It's hard to see the lexan in this photo, but it comes down at about a 65 degree angle below the horizontal and meets a nearly horizontal piece of coroplast.
And here she sits... have to finish the other side and slap on some under-panels just going back as far as the engine/transmission to smooth things out and encourage the possibility of airflow through the radiator when it is needed. License plate will cover 2 of the 4 air inlets during the wintertime, and be moved in the summer. Planning an adjustable door for the other two.

Wednesday, August 5, 2009

SolarArray

I've been contemplating this mod for a while - about 6 months. I was waiting to figure out the alternatorless stuff so it would actually be coupled with improved fuel economy, but I'm confident that I'll get that figured out soon, and my free time is running out fast with the school year approaching. Enjoy.
For starters, I had to clean up the roof.
I got this $45 piece of plexiglass for $25 at Lowes thanks to the damaged chunk. I thought this was a terrific deal until later when I noticed it is about twice as thick as the pieces I used on the Kammback, making it stiffer and more likely to split... Argh. I think I'll have to re-do this with a different material after this winter - time will tell.Plegiglass, cut to the roof's shape:Removing the remaining pieces of protruding roof-rack materials that I didn't delete yet - they're the loose pieces atop the roof.The roof's ready - or not.
I decided to paint the top white for three reasons.
1. Extra insulation from the bottoms of the conductive panels; there were bolt-holes and some surface rust on the roof.
2. Keeping the roof cooler in the sun - like school busses and mini coopers - for me, for the panels (they work better when cool), and to slightly reduce the Earth's albedo. :)
3. The silicon caulk that I plan to use to seal the plexiglass against the roof is white, so matching the roof will improve the W.A.F. (Wife Acceptance Factor)
The sandpaper to roughen up the surface:
The roof, lightly sanded:Taped off and ready to paint:Primer painted on:White paint:Now for the fun part - Solar Cells!
I bought a bunch of tabbed solar cells on Ebay in March for a project my students were doing in class. The auction was for 108 cells, way more than they could afford, but I assured them I would use the extra.
They run $2.50 apiece and are rated at: 3.7A, 0.5V apiece (1.85W) under maximum sunlight. Each cell has 2 tabs attached to the top side and two rows of solder points on the back. To attach them in series, you lay one cell's tabs atop the next cell's back, and solder at the solder points. I made strings that were 14 cells long. I was planning on doing 15 cells, then putting 2 strings together for 30 cells * 0.5V per cell = 15V for a good input to the charge controller I haven't built yet. My roof was slightly too short, so I'll probably have to put more cells on the Kammback to get the voltage up enough. I ran electrical tape across the tabs and put a dab of silicon in the center of each cell. (One string - ready to install, other - just soldered)

Laying out the strings on the roof. Yes, I realize I have 5 strings, and I can only use 4 with my plan to get the voltage I desire, but I figure if I do this, I'm going all out and I may want to put panels elsewhere later. This was my downfall; if I had only used 4 strings, I could've used the size available of the thinner, more flexible plexiglass.
I used bricks to hold the setup down overnight. Later, when I was screwing it down, I used about 15 bricks to hold the plastic to the roof's slight curvature. It helped to leave the protective peel-off plastic on until the end. (just had to remember to remove the underside when I was ready to screw it on)
Finished product photos: The back of the roof - notice one string of cells has a bit more space behind it than the other. I scooted it forward and added my homemade desiccant. I was worried about condensation on the inside of the glass looking horrible, decreasing performance, or damaging cells. I wrapped up some of my daughter's dry rice cereal mix inside a paper towel, and voila! Moisture trap! The visible wiring:More top pics:

My wife actually kind of liked it - she said it was "nice". First thing she's ever liked on this car! Now: Performance data: (preliminary)
In the shade (only using 4 of the 5 strings): 14V, 1A (14W)
Pushed the car into the sun at 2:45PM: 14.5V, 5.4A (78W)
So the whole roof is worth about 100W for probably 4-5 hours in mid-day sun after all wiring is eventually done. Cool.

Saturday, August 1, 2009

Alternatorless... or not

I recently (two weeks ago) tested the effects of disconnecting my serpentine belt while driving. Others have done this (or similar things) with much success:
Orange4boy's Toyota Previa
MetroMPG's Firefly (metro)
Daox's Paseo
The belt on this vehicle runs the a/c, p/s, and alt. The timing belt runs the water pump, conveniently.
I had tried monitoring tank-to-tank runs earlier this year without much repeatable success. This day I decided to do some A-B-A runs.
I did a 10-mile round trip run, all highway with a turn halfway, and did no pulse -and- glide, so as to maximize the effect of having the accessories running or not. I did the first couple of trips with the belt on, then did two with it off. Average FE went from 42.5 mpg to 43.2 mpg. Not convincing.
I went home and decided to do some monitoring of my voltage while driving beltless, and measured it to be hovering around 12.2-12.5V. In an effort to boost that, I connected another battery in the car to my normal battery via a 6A battery charger, hoping to get voltage up to 13.5V or higher. I repeated my test run, but alas, the voltage remained below 12.5V even with 6A coming in from the charger.
I'm not ready to call it quits, because I know there is a way to solve this somehow, in a cost-effective fashion. I know there is energy being wasted by my belt and accessories, even without the alternator being included. This should lie somewhere around 8% or higher with no belt at all, and it should show up easily in testing. Time to re-formulate a plan to delete the darned alternator system!

Friday, July 10, 2009

Kammback

Finally! I had some time to play with the car after doing some needed repairs and working on the house/yard this summer. This is a good mod; it is the first one I have tested to my satisfaction since installing and calibrating my MPGuino fuel economy gauge.
The theory of this modification involves two things, changing the shape of the rear of the car, and changing the size of the rear of the car. Both contribute to dragging around a smaller wake.
The air flowing over/beside the car needs a clean, crisp "separation" edge, so a fin extending past the rear of the car will help this. Many new cars have integrated these little fins into their design to improve economy. A common and easily seen example is the back of the Dodge Caliber, but smaller ones are all over, including on the top of new truck tailgates.
Reducing the size of the wake also yields benefits, so tapering at the rear of the vehicle (at the correct angle) Typically this angle is around 30 degrees below the horizontal. From the explanation by Phil Knox, the tail on your vehicle should point to a place on the ground that is 1.78 times longer than your car's height where you want the taper to begin.
My inspiration comes from 4 sources:
Basjoos's Aerocivic
AndrewJ's civic
Darin's Firefly (Metro)
TomO's ClearKamm
Ok, on with the photos!!!
I chose to use galvanized 1/2" metal conduit for the frame. Cheap, strong, and easy to bend with a hammer. This shows how it's connected to the top of the car's hatch. A sheet metal screw through the top now holds it in place permanently:
The conduit extends 1 meter from the top, is hammered flat and bent, then attaches to the bottom of the hatch:
A cross-bar is held in place by bolts on the hatch's underside and two small pieces of conduit go down the edges of the window:
This shows the completed frame. Next step is to figure out where to use coroplast and where to use plexiglass, to cut down on the cost:This looks like it might obscure the rear visibility with this much covered with opaque coroplast, but here's the view from the inside:Not too bad. Well, the wife didn't approve. Something about "no more campaign signs on the car" and "I'm not going to ride in it anymore" Something I'm sure many other ecomodders hear all too often! Well, the solution is to spend ridiculous amounts of money on all plexiglass:Note the placement of my two shiny new Ecomodder decals courtesy of Dan (Intrigued). They are way more visible than the static clings (they really are in the photos!)And all the utility of the hatch is preserved. I just have to bend my knees to open it; the tip reaches my shoulder when I lift the latch. Just have to remember it's on there when shutting it - it almost gave me a concussion the first time! :)
Drove it around for a couple days with no problems. Many more looks than I used to get though, so I definitely need to post my fuel economy up on the car to explain all the junk on the car. I even attracted the attention of two of my neighbors who are interested in getting better gas mileage and they're going to check out the EM forum now!

Now what you've all been waiting for: Fuel economy results!
I did A-B-B-A testing (After Kammback, Before Kammback) I left the frame on and just took off the plastic. My test route for this was highway only; 20 miles round trip with an overpass-turn around in the middle. I used pulse-and-glide on each hill, but set rules: I had to reach 60 mph before each coast, and I did not coast below 55 mph. Raw numbers:
A: 55.2 mpg
B: 51.2 mpg
B: 50.2 mpg
A: 54.8 mpg
Average of B runs: 50.7 mpg
Average of A runs: 55.0 mpg
I'm comfortable saying it is worth 4 mpg highway - a pretty good improvement.

Sunday, June 21, 2009

photo-op and prelude to restart of blog

I had to include these photos from our recent trip to Colorado. Enjoy!

Sunday, November 23, 2008

It's been awhile!

Since school started and my focus has been either there or at home with Charlotte, I haven't done much ecomodding. Actually, I've done negative ecomodding; I removed my coroplast stuff to get an alignment check and I haven't reinstalled it yet. The main reason I'm waiting is that I'm trying to build my MPGuino - I was really disappointed with my original idea to monitor tank-to-tank mileage with mods, because it wasn't reliable. In true form with scientific method, I'm stopping my experimentation and restarting everything after I get some electronic, instantaneous numbers.
Stay tuned for some ecomodding after Christmas!
plans:
-newer style front air dam and belly pan - starting out farther, about 4cm higher from the ground (old one scraped a lot!) and going up to the hood level. Also a sweet chin spoiler!
-complete detachment of alternator electronics via installation of Deep Cycle battery to have plug-in electrical power supplied from my home (we buy Wind Power Renewable Energy Credits from our power company for 100% of our needs, so no fossil fuel emissions!!)
-Removal of power steering system. This car definitely doesn't need P/S. I can turn the wheel at a dead stop with the car off, and looping the lines will make this even easier.
-installation of 45W solar panels in roof to augment alternator-less condition for more range
-something to clean up the wake of the car off the rear.
My target is 60 mpg on my daily commute.

Monday, October 13, 2008

Old Mustang - good aero? Photo for thought.


Ugly, but probably had decent Cd and therefore would have high top speed. Might not be stable at speed without a spoiler though.
Something new:

Thursday, September 25, 2008

Still shooting for the 500 mile club...

My last several tanks have shown a 40 mpg average. I was hoping to get to 500 miles on this tank, but I didn't want to push it today, wussed out, and filled up with 1/2 gallon to spare. I wouldn't have made it anyway :( Of course, my odometer read 576 miles, but I'm pretty sure I just didn't reset the odometer at my last fill-up. Oh well, I know I can hit 500 on my next tank.... time to maxinflate the tires. I'm postponing official...official testing a bit longer.. turns out the baby and school are keeping me BUSY and I'm also watching the MPGuino project on Ecomodder.com - since my mpgs are all over the place by as much as 4%, I want to have a real-time, electronic measurement of my mileage. Right now that's available to only '96 and newer cars with a ScanGauge, but the MPGuino will make it possible to do it in the 'scort.

Wednesday, August 20, 2008

New Tires...Yay!!


I took a trip with my daughter, Charlotte, to AutoTire today. I did some calling and they had the best deal, and the best warranty/free service that goes with the tires. They got the car in quick and put on 4 new tires for $200 including tax. I had one tire that leaked 5psi per week, two that were worn to ~ 2/32" - around the state minimum. The fourth tire on the car was horrible, with flat spots and bulges. All four wheels were out of balance, which resulted in lots of my down-the-road energy being converted to up and down vibration. Aside from being noisy as heck on the highway and making the back seat the "rumble seat", it takes a lot of energy to shake the car as much as it did. Time to top off and watch the next couple tankfuls!
I noticed a very quiet ride on the way home and longer coasts, even with the tires at the same pressure as before. School starts tomorrow, so I can run the car down my official "coastdown testing hill" a few times over the next two tanks to observe any change.
One other bonus for after I establish how much gas I was wasting because of bad tires: my old tires' max pressure was 35 psi. The new ones? 51. :)

Monday, August 18, 2008

More Mainstreaming of Ecodriving

Although they're later than others, so I don't think they should be able to trademark the term, "ecodriver", I'm happy to see US automakers and everyone's favorite governor backing ecodriving. Check it out!
http://www.ecodrivingusa.com/
Official testing of the 'scort is due to begin in a couple of weeks. It's due for some new tires, and my commute will become regular once our little one begins daycare. Stay tuned!!!

Tuesday, July 15, 2008

Plans for Partial Alternator Elimination

I've been thinking about this for a couple of days, and after reading about mpg gains in the 10% range on ecomodder.com via removal of the alternator belt, reading about GM's EV-1 plug-in electric car (which worked fine, but they destroyed because... well who knows) and the new, exciting aptera, I've decided to hybridize the Gascort.
Removing the alternator belt is good for testing, but not especially valuable for long-term use. In addition, the computer, fuel pump, and injectors rely on a 14-15V source from the alternator; the battery only runs about 12-12.5V at best, so running them on the batteries when they were designed with the alternator in mind can actually cause worse performance of injectors and sensors, hurting fuel economy. Several other ecomodders have done this with no ill effects and increased FE, but I'd like to modify their ideas a bit for my own use. I'm planning to lessen the load on the alternator by only having it attached to crucial electronics and disconnecting it from the rest of the car. This should work to increase horsepower and reduce drag, because alternators vary the amount of resistance inside them to correspond with electrical demand. When my buddy Brandon had a huge (2000W at least) stereo in his car, you could feel the car dragging hard when he turned on his amplifier.
Whoa..Wait a second there, professor. You can't just disconnect everything else and have it magically charge up by itself, for free! That energy has to come from somewhere, doesn't it?
Yes. I'm planning on plugging my car in at night to charge for the non-integral systems, namely the lights, radio, wipers, blower fan, and the starter. Eventually I'd like to add a solar panel to charge while the car's parked at work.
How does this fit in with the whole saving fuel bit? Here are my three arguments as to why I'm doing it:
First, consider that you're using a relatively cheaply made alternator to take mechanical energy and turn it into electrical energy. The electric utilities have much larger and thus more efficient units with less mechanical energy wasted as friction.
Second, consider your source of mechanical energy. Your car, with its fairly advanced emission controls and fuel-injection technology is good at extracting energy from gasoline, but isn't as optimal as it could be.

Third, consider the cost of fuels from which we're making electricity. Coal (our traditional source) is WAY cheaper than oil and will continue to be for the foreseeable future; we have at least 300 years of it left. Nuclear, hydroelectric, wind, and solar are cheaper as well, and will only become better (cheaper than the equivalent amount of energy from oil) in the future.
Google.org (Google's philanthropic group) is developing plug-in hybrid technology now with their fleet. Check it out - it's pretty cool and it drives the effective efficiency of their hybrids up considerably. They consider their gas MPG and log the cost of electricity used to charge them overnight for a cumulative MPG total.
http://www.google.org/recharge/

Here's a schematic of my plan. (click to enlarge) It allows for a cheap lawn mower battery to be used as a capacitor in the alternator - ecu circuit, and a source of power as the ecu needs to be on before the engine is turned over.
The regular car battery remains in its current state, wired to everything else on the car. I'll install a heavy gauge wire and a heavy duty "charge switch" between the two systems so I have the option of using the alternator as it's typically used. I think I'll try to use it when decelerating at offramps and down hills as well. The reason I want it to be capable of 50-60A is so if the big battery is drained down past the point where it'll turn the starter, I can use the lawn mower battery to do the job (infrequently, for sure, but a nice emergency jump-starter).
I will need to get a volt-meter to monitor my big battery's charge so I can charge it before it goes dead. For now, I'll probably wire my Digital MultiMeter (DMM) in to watch it.