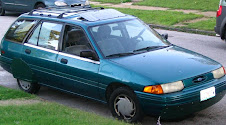
 No, I'm not campaigning for Hayes. That's a corrugated plastic sign (coroplast) that I picked up for free after the election. (I got 100 of them) I also needed some support structure that was cheap and lightweight. Luckily, I found something to fit this need in my basement, left by the previous owner; sheetrock (drywall) corner - reinforcing metal braces. (I don't know what they're really called) Here are my assembled tools; drill, 1/4" nut driver bit, 3/32" drill bit, measuring tape, duct tape (bought the highest quality type), self-tapping sheet metal screws, large washers, tin snips, pliers, and a comfy seat. The sheetrock corner-thing is the piece of metal there. I folded it flat (usually it is at 90 degrees).
I decided to run one brace across the wheel well and one at the bottom, attached to the sign. Here's the first brace. I attached it to the inside of the door opening with a sheet metal screw and to the back bumper with a spare interior trim screw.


I then taped two signs together, enough to cover the opening, , set it inside the folded sheetrock brace, taped the bottom up (coroplast is hollow and open at the ends)and ran 4 sheet metal screws through it to lock it in place. It felt pretty rigid after this. Here's what I mean by, "inside the folded brace":
I also cut the pointy heads off the sheet metal screws that would be pointing in toward the tire with my dremel.
Next, I bent the bottom brace out so that the coroplast would clear the wheel, and screwed the front side of the brace into the door opening, and the back into the rear bumper. I used my knife to cut the shape of the skirt, which took some trial and error, but luckily I cut off small pieces each time and all was not lost. After getting a good fit (especially around the rear door), I removed the skirt and taped all the edges to seal them and for support when screws and washers hold it in place. After re-installing the bottom brace screws, I used 10 sheet metal screws and washers around the edge to affix it to the car. You wouldn't want to do this to a nice car, but for my purposes, it should work great. I taped the leading edge into the door opening to ensure smooth airflow outside the wheel well, and the door shuts well, clearing the skirt.


 I think I will add a little "class" to this mod and paint the coroplast, so they will end up costing about $5 in materials each. I'm going to either do white with my "ecomodder.com" decals on them to help them stand out, or green to match the car. I'll be running a poll on the ecomodder forums to decide for me.


2 comments:
Sweet! Love it! Just leave the signs how they are, or maybe write "baby on board" over it....haha.
Nice... I think the "Babies R Us" shade does that already! :)
My neighbors were starting to leer before I painted them today... I'm becoming "that neighbor".
Post a Comment